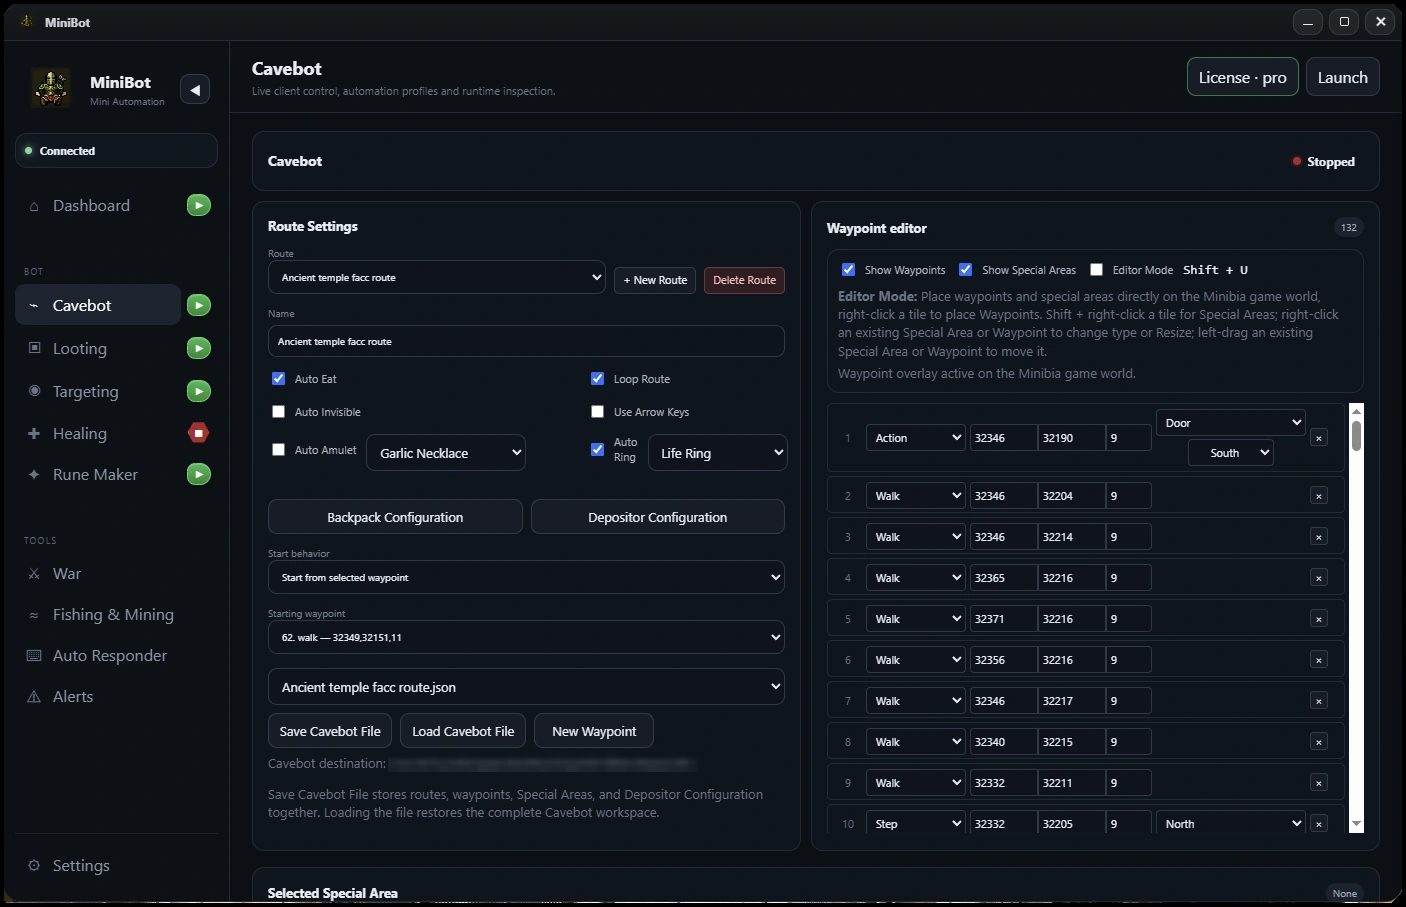
Start with a short, repeatable route
Open MiniBot’s Cavebot section and choose a familiar area with straightforward movement. Start with a handful of walking waypoints rather than a large downloaded route. Your first goal is simply to confirm that each waypoint reaches the correct tile and that the route can repeat without becoming stranded.
Use the editor’s available movement and interaction waypoint types only where the route needs them. Keep floor transitions and doors in a separate section of the route so you can test those transitions one at a time.
- Create or open a Cavebot file.
- Place a short series of Walk waypoints through a safe route.
- Add Stand, Tool or other interaction waypoints only when the route requires them.
- Run the loop while watching player position and waypoint progression.
Test route behavior before adding combat
Check that the character arrives at the expected coordinates, including the correct floor. A path that looks right on the map can still fail because of an obstacle, blocked destination or incorrect action direction.
When a route pauses, troubleshoot the first waypoint that failed instead of adding extra waypoints at random. Save a known-good file once movement works so you have a rollback point if later settings introduce problems.
Connect supply checks and route changes
Once the hunting loop is stable, add a Supply Check waypoint or relevant capacity condition. Configure which route should run when its condition is met. The Route Change waypoint can also switch routes without applying supply logic; this is useful when you want deliberate transitions between route segments.
Test each branch deliberately: first trigger the supply condition under supervision, then confirm the character enters the intended return route. Avoid assuming that a route switch will work just because the normal loop does.
Add Smart Targeting and Looting last
A Cavebot route handles navigation; Smart Targeting handles creature selection, and Smart Looting handles corpse and item processing. Test them individually before running everything together. A reliable order is navigation → targeting → looting → supplies and depot.
Test interruptions too: a crowded tile, blocked path, interrupted loot attempt or missing supply should not leave you guessing which system is active.
Save, retest and monitor
Save the route and its associated configuration, then reload it once to verify the intended settings persist. After changing waypoints, backpacks, creatures or floor transitions, perform another supervised run.
MiniBot supports long-running, Full AFK-style configurations, but no route guarantees uninterrupted results. Client state, player position, connection and changing game conditions all matter.
Before you enable a longer session
- Start with a familiar route and a small waypoint loop
- Verify coordinates and floor transitions
- Test Supply Check and Route Change branches
- Validate Targeting and Looting separately
- Save a working Cavebot file before extending it
MiniBot is not affiliated with or endorsed by Minibia. Minibia’s published rules prohibit cavebotting and other non-native automation. Features may not work in every situation; review the game rules before use.